Manahearts: A Mage Knight Scenario

Requires Mage Knight & Mage Knight: The Lost Legion
3 Chapter mostly competitive Scenario (best with 4)

At the end of each chapter, each player scored themselves per normal rules plus scenario specific bonus.  At the end of the third chapter, whoever has the highest score over all 3 chapters wins, even if they lost or were eliminated from previous chapters.

The cards required for this scenario can be FOUND HERE. They are intentionally made with light print and small size because it makes it possible to keep what’s written on them secret, even when printed on normal printer paper. Sorry for the poor layout. I have no real excuse.

General Scenario Rules

  • Mage Knights can go over the Fame limit on the fame track.  If the Mage Knight would reach maximum Fame, they put their shield marker back to second from the bottom row (80), with an additional shield on top to note the second time around.
    • Each time the Mage Knight would gain a skill and advanced ability, that works as normal.
    • Each time the Mage Knight would gain additional armor, increased draw limit and unit token, instead the Mage Knight only gains 1 additional armor.

Chapter 1 – Forging the Manahearts

Story

in this chapter, the mage knights have to try to find illusive Manahearts.  However, it is known they appear to be normal mana crystals but must be forged into a Manaheart, but not any mana crystal will work.

Setup

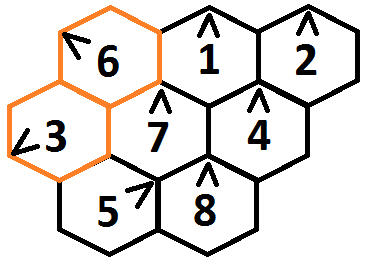
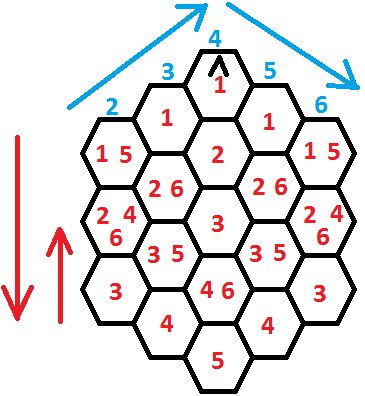
Map shape is up to the players to decide. However, because this scenario is best played with 4 players, it is recommended to play with a wedge shape and use all available map tiles, stacking country tiles on top of the core tiles, as normal.
All skill tokens are used, competitive and cooperative. Players have full opportunity to work together and battle one another throughout this campaign.

Testing a Crystal

Only one crystal can be tested each round and takes the player’s encounter for that turn.  Anytime a player wants to test a crystal they must take it to a magical grove.  If tested, the player rolls 2 mana dice.  If both dice show the same color as the crystal being tested, an unforged Manaheart for that color has been found.  That player takes the Unforged Manaheart card of the appropriate color. Gold and Black can not be used to substitute for a color for this roll.  There can only be 1 Manaheart (unforged or forged) for each base color: Red, White, Blue, Green.  

Forging a Manaheart

Once an appropriate crystal is found that can be forged into a Manaheart, the player must take that crystal to a place to be forged into a functional Manaheart.  Depending on how many Manahearts have been forged, the players must go to different locations.  The first Manaheart must be forged at a Village.  The second Manaheart must be forged at a Monastery.  The third Manaheart must be forged at a Mage Tower.  The fourth Manaheart must be forged at a city.  In this scenario, monasteries can be attacked for an artifact, but they monastery is not destroyed in the process.  The player still marks the monastery with a shield to show that the artifact has been stolen and that that player is no longer allowed to use the services of that monastery. Only one artifact can be stolen from each monastery.
To forge at a mage tower or city still requires defeating the tower or city to gain initial access.
The people of that location can forge the crystal into a Manaheart.  However it takes time.  The process is complete at the end of the round.  The player leaves the crystal at the location.  At the start of the next round, the Manaheart has been forged and the player who dropped it off can go pick it up without a fight.  However, another player can attack the location to steal the Manaheart if they get there first. Once the forged Manaheart is acquired, discard the Unforged Manaheart card and take the Manaheart card instead.
If attacking a village, draw 1 gray token to fight.  If attacking a Monastery, draw 1 purple token.  If attacking a mage tower, draw 1 purple and 1 gray.  If attacking a city, draw the first half of the token present on the dial, rounded up.

Manaheart Abilities

Owning a Manaheart provides many bonuses.
  • Once per turn, it can be used to change a die in the source to the color of that Manaheart.
  • Once per round, can be used to take a card of that color from your discard and shuffle it back into your deed deck.
  • If every die in the source is the same color as the Manaheart, that Manaheart becomes empowered until the source is no longer all that color.
    • While empowered, players do not reroll dice back into the source after using them.  Die used from the source are placed to the side of the board until the last die is used, at which point all the dice are rolled back into the source which will likely cause the Manaheart to no longer be empowered. Cards that force a die in the source to be rerolled do not function correctly and play as though they rolled or chose the color of the empowered Manaheart.
    • The player with an empowered Manaheart can play a card sideways to add +2 to the trait listed in the following table, instead of +1. Cards gain +3 if that card is the same color as the Manaheart.
    • The listed effect is also gained.
COLOR
EFFECT
ABILITY
Red
Attack
All attacks become Coldfire Siege
White
Influence
Refresh all units at the start of each of your turns.
Blue
Defense
You have +3 armor and Resistance to all attacks.
Green
Move
All terrain costs are 1/2.


If a player attacks another player and defeats them, the winning player may steal their Manaheart.  No Mage knight may hold more than one Manaheart at a time.  
If a player would do some action so they would be holding more than 1 manaheart, they can only hold one and must choose.  Place a mana crystal of the appropriate color in their hex to indicate the dropped Manaheart. Any player may pick it up by moving into that hex. A player standing the same hex as a manaheart can use the non-empowered abilities of the manaheart.

Goal

The goal of this scenario is the players to find all 4 Manahearts.  Once they have all been forged, this Chapter ends.  

Scoring

5 per manaheart found
10 per manaheart forged
20 per manaheart held or in the same hex at end of chapter

Chapter 2 – Pure Manaheart

Story

In this scenario the Volkaire has shown up on the scene and he has discovered a Black Manaheart. While he carries the Black Manaheart, Volkaire can not be hurt. The Mage knights must work together to forge a Gold Manaheart to overcome his defenses and defeat Volkaire.

Setup

The game is set up the same as Volkaire’s Quest. The Race Level is up to the players.  However it is highly recommended to play on a Fair Race level and Heroic or Legendary Combat level, because the Mage Knights have already gained some levels. The players keep everything they had from the previous chapter, but the map is reset.
During setup, go through all of the map tiles and find each tile with an Ancient Runes and make sure they are included in whichever map setup the players choose. Additionally, go through the Ancient Runes tiles and find the Altar for each of the base mana colors. Add enough other random altar tiles so there are enough for each Ancient Runes. Return the rest to the box and shuffle the tiles for use during the game.

Forging the Gold Manaheart

The Mage Knights must take their Manahearts and forge them together to create the Gold Manaheart.

Infusing the Manahearts

To do this, the players must find every mana alter and infuse that Manaheart with power from a different source.  The player must spend the mana as normal, have the same colored Manaheart and power the Manaheart with something, depending on the color of the Manaheart.
Red is powered by pain and the player must take 4 wound cards into their hand
White is powered by alliance and the player must have at least 10 levels of followers
Blue is powered by protection and the player must take no wounds from a Coldfire Attack 10. This attack can not be put onto units.
Green is powered by nature and the player must have visited a magic grove, a mana mine and any other underground locations (monster den, spawning ground, labryrinth, dungeon, etc) during this round.

Combining the Manaheart Shards

As each Manaheart is infused, that Manaheart is broken into a shard, rendering it useless. Discard the Manaheart card and take the Manaheart Shard card instead. However, once all the Manaheart shards are brought together they fuse into a Gold Manaheart.  Each player maintains control of their manaheart shard, and multiple shards can be carried by one mage knight.  Once a single player holds all four shards, the gold manaheart is created.


Volkaire can only be hurt by the one holding the Gold Manaheart.
A mage knight with the Gold Manaheart can pass to to a mage knight in an adjacent hex by spending 2 Move and 1 Influence.
Mage Knights may combat each other for control of the Gold Manaheart. A victorious player gains the Gold Manaheart after combat.

Gold Manaheart Abilities

Whomever has the Gold Manaheart gains the following abilities.
  • The mage knight holding the gold manaheart can play any card sideways for +2 instead of +1.
  • The player may spend a mana of any base color to turn the Gold Manaheart into that color temporarily. Place the appropriate Manaheart card next to the Gold Manaheart card to indicate which color is currently active.

Goal

If the players defeat Volkaire, they use the Gold Manaheart to shatter the Black Manaheart. They win the Chapter and continue to the next chapter with no penalty.
If Volkaire makes it to the portal, the Black Manaheart shatters upon contact with the portal and the imbalance of power causes the Gold Manaheart to shatter as well.  The players lose this Chapter and suffer penalties in the next Chapter.

Scoring

30 for defeating Volkaire
20 for holding Gold manaheart at the end of the chapter


Chapter 3 – Collapse

Story

With the Manahearts shattered, the world has lost its foundation and begins to crumble on itself.
Players keep everything they had in the previous chapter and the map does not change.


When the pure manahearts shattered, shards of both flew everywhere and the mage knights have a chance to grab a Gold or Black shard.  Grabbing both causes them to disintegrate each other.  The world is literally falling apart and only one pure manaheart shard can be brought back.  If a Gold shard is brought back, a time of peace and serenity will come.  If a black manaheart shard is brought back, corruption and villainy will reign.

Setup

At the start of the chapter, each player is given a Gold Manaheart Shard card and a Black Manaheart Shard card. At the end of the game, only one team can win, but all Mage Knights could be on the same team. Each player, going in any order, discards one of the Shard cards facedown and explains which card they are choosing to keep. Bluffing is allowed. The discarded cards are shuffled and revealed. If each Mage Knight discarded the same color, they are all working together to survive the collapsing world. If they did not all choose the same color Shard to keep, then they are not all working together, but they do not know who is on which side.


Go through the Country and Core cards and build a deck of 2 copies of each card whose tile is present on the map. Shuffle the deck and place it to the side. This is the Collapse Deck.


Additionally, every rampaging location is filled with an appropriate monster token.

Collapsing the World

At the end of each turn rotation, each player secretly draws 2 cards from the Collapse Deck and secretly chooses one and discards the other facedown. The chosen cards are piled together and is shuffled and displayed to all players.  For each tile number on the revealed cards, that tile is damaged.  Any mage knights on that tile take a 2 wounds into their hand.  Also put a marker on the tile to show it is collapsing.  If a collapsing tile is damaged again, the tile is destroyed.  Any mage knights on the tile are killed and removed from the game.  That player is eliminated and sits the remainder of the game.

Continuing the Story

If the players lost Chapter 2 and Volkaire escaped, the players draw twice as many collapse cards as there are Mage Knights, damaging (potentially destroying) those tiles before the game starts.

Gameplay

Players can not make use of villages, mage towers, monasteries and keeps during this chapter.  The residents of those locations have all fled.

Goal

Mage knights are racing back to the portal of the world before the world swallows them.  Whichever color shard gets to the portal first is the winner, sealing the losing team away in a collapsing world.

Scoring

35 for being the first player out
15 for being on winning team
-50 for being eliminated

Posted in board game, Mage Knight, scenario, variant | Leave a comment

I have a Patreon Page!

It’s been a long time since I’ve posted anything on this blog, but that doesn’t mean I haven’t been working. In fact I’m probably more involved with gaming than I’ve been in a long time. To the point that, I’ve set up a Patreon page so you can support me in this and get neat rewards along the way.

If this blog isn’t evidence enough, I’m very passionate about games and I love designing and building them. I’m working on some original games now and could use some supplies and playtesters and people with skills that I don’t have. I am far from being a professional. I’m just one guy who loves games but I would love to be able to get enough foundation to get one of my designs crowdfunded on Kickstarter into a real published game. That’s the dream for me. But it could become reality with your help.

My main focus right now is a card drafting, sorta worker placement game where the players take the role of a monster terrorizing a nearby town and each monster grows and evolves through the game through drafting. But because each monster has a unique deck with unique abilities, you might pick up some abilities from your opponents. Become the fire-breathing, brain-eating, blood-sucking ghost ogre you’ve always dreamed of!

Thanks, friends!

Posted in Uncategorized | Leave a comment

Dino Riot! (v 1.1)

(Updated 5 March 2015)
A fully cooperative Sentinels: Tactics scenario for 3 to 5 players.
Requires Sentinels: Tactics – The Flame of Freedom and Sentinels: Tactics – Uprising.

CRASH!! CRACK!! KA-CHOOOOMM!  A sudden explosion rocks all of Megalopolis with a massive earthquake causing an entire section of the city to fall into the chasm. Where those city blocks stood is now a mountain ridge. Before anyone has time to react, ancient dinosaurs start pouring over the ridge. As if that wasn’t enough, gangsters and thugs have taken the opportunity to riot within the city, taking anything they can and attacking anyone who gets too close. The citizens of Megalopolis are trying to find refuge within Freedom Tower or the hospital. But will they be able to survive the perilous journey across the broken city?

COMPONENTS
Typical gameplay components as well as:

8x Environment tiles (Megalopois / Insula Primilis)
10?(all) Human tokens (Civilian / Thug)
4x Velociraptor tokens
1x Tyrannosaurus Rex token
2x Scenario Markers

SET UP
Tiles 3 and 6 are Insula Primilis
Remaining tiles are Megalopolis

Get all of the human tokens (Civilian/Thug). Create a pile using all of the human tokens, alternating between Thug and Civilian, starting with Thug there should never be more Civilians in the pile than there are Thugs.

The Elevation 2 and Elevation 3 mountain hexes of Tiles 2 and 8 can never be hazard spaces from Hero abilities (Blazing Tornado, Turret Bot, etc). This includes the entire ridge of those tiles.

Hex Grid Diagram
Several mechanics in this scenario require being able to designate a specific hex on a tile. Spawning humans requires this. These rules will use a method like 4:3:4 to show which hex. The first number shows which tile is being referred to. The second number (Blue text) shows which column on the tile to use. The last number (Red text) shows how far down the column to go, coming back if need be.


Place Extraction Points
Place a marker on (8:4:4) and (2:4:2). These are the points the Civilians are attempting to get towards.

Placing Heroes
Heroes start on Tile 8, in the 2 rows on the lower right, from (8:3:4) to (8:6:3)

Spawning Dinosaurs
The Dinosaurs start on the Tiles 3 and 6.  The Velociraptors spawn on any of the Elevation 3 spots on those tiles.  That’s (3:5:1)(6:3:1)(6:4:1)(6:4:2), and (6:5:1) .  The T-Rex starts spanning Tile 3 and Tile 6. Going on hexes (3:5:4) and (6:2:2).
Dinosaurs spawned do get to take a turn on the turn they are spawned.

Spawning Humans
Create a pile using all of the remaining human tokens, alternating between Thug and Civilian, starting with Thug (there should never be more Civilians being placed than Thugs). Take the top token, as it is, and use the following to determine its placement.

Roll 3 dice: 1 White, 1 Blue and 1 Red.
White die determines which tile the human appears:  1 > Tile 5
  2 > Tile 7
  3 > Tile 1
  4 > Tile 2
  5 > Tile 4
  6 > Tile 8
Blue determines which column the human appears on. Orienting the tile with the tile number at the top, count across the top row of hexes, starting with 2. 4 is the peak of the tile, with the tile number. 2 and 5 are the other corners and 3 and 5 are the spots between. Reroll a 1.
Red determines how far down in that column to place the human. Counting the first hex as 1, count down and and back, if needed. If that spot is occupied, place the human is the last available space that was counting during the Red roll. If need be, reroll Blue. If need be, reroll White as well.
If any Civilians would be placed on Tiles 2 or 8, flip the token to be a Thug instead.
Humans do not get a turn the turn they are spawned.

Gameplay
Phase Order: Respawn Dinosaurs, T-Rex, Velociraptors, Heroes, Thugs, Civilians, Respawn Humans

Respawn Dinosaurs
Dinosaurs respawn at the start of the round and each dinosaur killed will respawn.  There should always be 4 Raptors and 1 T-Rex on the board at the end of the Respawn Dinosaurs phase.

T-Rex
The T-Rex will attempt to move towards the target with the highest Health, even if there is a closer target.  However, if the T-Rex moves over or adjacent to a non-environment target at any point during its movement, the T-Rex attacks that target.  The T-Rex will only attack each target once per movement.  If a T-Rex approaches a group of targets, it will attack all adjacent non-dinosaur targets at the end of its movement.

Velociraptors
Velociraptors which are not hunting will move towards the closest non-environment target they can see.
As soon a Hero damages a Raptor, that player takes the Raptor scenario card in front of them.  The Raptors are now hunting that player. Each turn all Raptors will move up to their Move Value as to get as close to that player as possible, moving past other targets to get closer to their pray.  If another player hurts any Raptor, that player takes the Raptor card and becomes the Raptor’s pray. If the Raptor’s pray becomes incapacitated, the Raptor card is returned to aside the board and the Raptors are not hunting any target.

Thugs can not become hunted by Raptors, but Raptors will still attack Thugs. Velociraptors will not attack the T-Rex nor other Velociraptors .


Any Raptor within range 2 of any other Raptor is in a pack with that Raptor and all Raptors within range 2 of that Raptor.  So two Raptors could be 4 hexes from each other and still in a pack with each other if there is another Raptor within range 2 of both of them.

Raptors not in a pack move first.  If Raptors can not see any non-environment targets and are not in a pack, they will move towards each other into a pack. 
If Raptors can not see any non-environment target and are in a pack with at least 1 other Raptor, all Raptors in the pack (even if one member has already moved this turn) will Sprint towards the closest scenario marker, even if they can’t see it.  

Raptors generate hazard spaces, which work as normal for Sentinels: Tactics.  However, Raptors also trigger their hazard space attack if another target enters the Raptor’s range as a result of the Raptor’s movement.  So a Raptor will attack a target it approaches or a target it passes during its movement. If a Raptor approaches a group of targets, it will attack all adjacent targets at the end of its movement.

If a Raptor kills any target, that Raptor and all Raptors within the same pack, if any, get another turn.

In any case without specific ruling, the players get to choose in which order the Velociraptors take their turns.

Heroes
The Heroes get to take their turns during this phase.

If the Heroes kill the T-Rex, each Hero gets to take either an Attack +1 or a Defense +1 token.

If a Hero is incapacitated, they move back to Freedom Tower and their movement roll becomes “Roll 2, take the lower” for their next turn.

Thugs
On their turn, Thugs will attempt to move towards the target with the lowest Health, even if there is a closer target. They will not avoid any hazard spaces. Thugs will attack any non-Thug target. 


If a Thug can not see any target, they will remain in their spot.

Thugs stop moving as soon as they can attack a target and will not move away if there is already a target within reach at the start of their turn.

Like Raptors, Thugs generate hazard spaces. However Thugs do not trigger their hazard space attack if they move past a target.  They only use their attack at the end of their own movement and when a hazard attack would normally trigger. If a Thug approaches a group of targets, it will attack all adjacent targets at the end of its movement.

If the Thugs kill the T-Rex or a Hero, after the current turn, Spawn all available human tokens as Thugs then the Thugs all get an additional turn.

The players get to choose in which order the Thugs take their turns.

Civilians
Civilians will move towards the closer extraction marker, regardless of line of sight. They will move in such a way that they are numerically the closest they can get to that marker, taking the path of least resistance. In case of ties, the players get to choose. They will not avoid any hazard spaces.


Heroes can use an action to move an adjacent Civilian up to that Civilian’s Move Value in any way that Hero chooses.

Civilians can not enter an extraction point if it is occupied by a Villain token. Civilians can enter an extraction point if occupied by a Hero or Civilian.
Respawn Human
Humans respawn at the end of the round and each human token removed from the board for any reason will respawn.  There should always be every human token on the board at the end of the Respawn Humans phase.

Scoring
Every time a Civilian is killed, the Villain team gets a point.  Remove the Civilian from the board and place it in the pile to be repawned at the end of the round.

Every time a Civilian ends its turn on an extraction marker, after resolving any attacks made on it and surviving, the Hero team gets a point.  Remove the Civilian from the board and place it in the pile to be repawned at the end of the round.

Play continues to the first team to reach 12 points.

For Added Challenge
Add one or more of these small changes to ramp up the difficulty if you are finding this scenario too easy.  The following rules are roughly ordered least game changing to most.

– T-rex increases hex elevation (like Omnitron-V does)

– When a Hero becomes incapacitated, all Civilians on the board flip to Thugs.
– T-rex’s Move Value increases to 5.
– Thugs have 2 Health.
– A Thug that kills any target gets +1 Attack and +1 Defense permanently and cumulatively.
– The Villains only need 8 points to win.
– Raptors gain Mobility and 4 Move Value.
– Civilians can not enter a scenario marker if there is a Hero or another Civilian on that marker.
– Remove the scenario marker from the hospital.

Designer Notes

Until there is enough playtesting to find a good balance for scaling the scenario based on number of Heroes, having more Heroes only makes the scenario easier.

I had success with using 20 sided dice to keep score.  Placing one such die on the Thug scenario card to track the Villain score and another die on the Civilian scenario card to track Hero score.


Suggested Tactics
The Heroes need to divide their attention between keeping the dinosaurs contained, killing thugs and helping move civilians along. If the dinosaurs get into the city, they can cause massive casualties. Keeping them within their area is extremely important.  At worst, keep a hero hunted by the Raptors to keep them away from the Civilians.

Thugs and Civilians can appear anywhere, so it’s important the Heroes spread out to maintain a presence everywhere. Because Thugs go before the Civilians, it is important the Heroes do their best to be the closest targets for the Thugs.

Because of the elevation of Freedom Tower and that Civilians only have 3 move value, they can not enter Freedom Tower from the top and they must walk all the way around from the base of the tower, which causes a bottle necking. Heroes should consider using their actions to help move the Civilians along. Also, when using this action, the Hero gets to choose how the Civilian moves, the Hero can move the Civilian closer to the Hospital, which is easier to enter and can help maintain a better flow towards their safety.

A Thug which appears near an extraction point needs to be dealt with immediately. Civilians will continue running to their death at the hands of the Thug until he is killed.

Change Log (v 1.1)
– Modified villain movement to give each a unique ‘flavor’.
– Added Component section
– Added For Additional Challenge section
– Fixed formatting and sectioning of the rules
– Clarified some rules

Posted in cooperative, dinosaurs, heroes, Multiverse, Sentinels, Tactics, villains | Leave a comment

Drunkards of Catan

Settlers of Catan Drinking Game

I wanted a drinking game for Catan that was more than just “drink when you build a road!”.
Something a little more involved and integrated while staying simple.  Too many things to remember bog down the drinking!

Enjoy!

Created in image form for easy printing and sharing!

General

  • Build 1 Barrel of Alcohol with 1 Wheat & 1 Wood.
  • Use catan chits or coins to represent each barrel of alcohol.
  • Alcohol can be traded like any other resource.
  • Every 2 barrels of alcohol is 1 VP.

Drinking

  • At any time, any player may spend an alcohol token (return the token to the bank and take a drink) to take a resource card from the bank.
  • At any time, players may gift barrels of alcohol to other players, giving them an alcohol token and forcing them to drink.

Festivals

  • On a production roll showing doubles, all players have a festival and drink half of their alcohol.  All players return half (rounded up) of their alcohol tokens to the bank, taking a drink for each one returned.

(function(i,s,o,g,r,a,m){i[‘GoogleAnalyticsObject’]=r;i[r]=i[r]||function(){ (i[r].q=i[r].q||[]).push(arguments)},i[r].l=1*new Date();a=s.createElement(o), m=s.getElementsByTagName(o)[0];a.async=1;a.src=g;m.parentNode.insertBefore(a,m) })(window,document,’script’,’//www.google-analytics.com/analytics.js’,’ga’); ga(‘create’, ‘UA-57346717-1’, ‘auto’); ga(‘send’, ‘pageview’);

Posted in alcohol, catan, drinking, variants | 2 Comments

Munchkin RPG (v 0.1)

Rules Variant from Munchkin


In the world of Munchkin RPG, you play the role of a haphazard adventurer who doesn’t know much about much.  Somehow you got hired by the king to empty out a nearby dungeon of the great evil that lies within.  Your reward?  As much treasure as you can carry out of the dungeon and equal its weight from the royal treasure room.  Maybe also the princess if you’re lucky.  Or a prince if you like that instead. You’re handed a backpack full of random weapons, armors, potions, spells, traps, monster eggs, and race-altering mixtures and shoved out the door.  Luckily there is a merchant who has made camp right outside the dungeon entrance.  He’ll gladly trade with you and your friends.  Wait… friends?  You didn’t think you were the only one hired did you?  The king doesn’t care who emerges victorious, so long as the dungeon is empty by the time one of you leaves it.  Venture forth, young Munchkin and claim victory and treasure as your own!

GOAL

The goal of Munchkin RPG is simple.  Defeat the horrible dungeon boss.

SET UP

Give yourself stats.  Choose a High stat and a Medium stat and a Low stat.
A player’s High stat grants them the High bonus and the Medium bonus.  A player’s Medium Stat grants the Medium bonus and a players Low stat incurs the Low penalty.  Each player’s High stat also gives them a special ability usable once per life.  If the player dies, they are allowed to use their special ability again.
Additionally, players are allowed to sort through the deck to pick a Race before the game begins.  Players may not pick a Class in this manner.  They will have to find one as normal.

HIGH MEDIUM LOW
Strength +1 For Each Hand Slot Used
Extra Hand Slot
Special: MUNCHKIN RAGE!!!
+1 Minimum Level -1 Maximum Hand Size
Agility 2x Grenade effect
2 Extra Belt Slots
Special: Bait n’ Switch
Can equip grenades
face down
-1 to Run Away
Intellect +1 AP Per Round
2 Extra Spellbook Slots
Special: Hidden Agenda
Can spend 1000 gold
to go up a level
-1 AP Per Round

*Details for each stat effect are listed in Glossary/Help.

Players should use some sort of marker to indicate their stats, so they can not be forgotten mid-game.  however, players are allowed to change their stats in the middle of the game, so make sure it is something alterable.

Both decks (door and treasure) are shuffled separately.  Then players construct decks out of the available cards.  Decks must contain at least 12 cards minimum from either type of card (door or treasure) and must have exactly 40 cards.  The players do not get to look at the cards before choosing them.  The players choose how many of door and treasure cards they would like, then they receive that many of each at random.  Extra cards will make up the dungeon and the store inventory.  There is still a community door deck which players draw from, but there is no loot the room option.  Players use the door deck to fight monsters or become cursed.

Players each have a draw pile (backpack), a discard pile, equipment slots, a belt (for grenades) and a spellbook (for curses and traps) and a spot for their race and class, as shown below.

Example Player Layout

Take the remaining treasure cards and deal out 6 random treasure cards and place them all face up in a line in the middle of the play area.  This makes up what the store currently has on sale.  The rest of the treasure cards are placed next to the stock for the remainder of the store’s inventory.

The top cards of the door deck are revealed until 6 monsters are revealed. These cards are shuffled together and one is placed face down at random. This is the dungeon boss. The 5 remaining monsters are shuffled into the dungeon.

The end result should look something like the image below.

Example Table Layout

Players then draw 6 cards from their backpack.

The first player is determined randomly.  That player’s turn marks the start of the first round.  Play passes to the left.  Once each player has taken a turn, the round ends.  At the end of each round, several game effects take place, as listed later.

After setup, players discard down to having maximum 2 cards in their hand.

RULE CHANGES

Beyond the obvious changes made to the game, there are several less noticeable changes which should be pointed out.

  • No Looting the Room
  • No buying a level
  • No playing directly from your hand into combat.
  • Maximum hand size is 2.  
  • Cards discarded at the end of a player’s turn are placed on the bottom of the store’s inventory instead of given as charity.
  • Anytime a player shuffles their backpack, they should do so under the table to avoid knowing what type of card will be on top while they shuffle.
  • Players can gain levels to go above level 10.  This has no effect other than making the player stronger in combat.

GAMEPLAY

Players get 5 action points per round.  Action points are restored at the beginning of each round and can be used only during their own turn.  The only exception to this is Throwing an Item and Casting a Spell, which can both be done on an opponent’s turn.

Players who have reached 4th level gain an extra AP per round.  Players who have reached 8th level gain another extra AP per round.  These Action Points are gain immediately and can be used the turn the player gains that milestone level.

If a player uses all of his action points before his turn, he can only take actions that use no AP.
Players are highly encouraged to use some sort of tokens to indicate how many action points they have in each round.

Available actions

No Action Points

  • Equipping – A player takes an item from his hand and places the card in the appropriate slot on his board (equipment, belt or spellbook).  Items placed as equipment or on the belt must be placed faceup.  Cards places in the spellbook have the option to be placed facedown, but may be placed faceup if the player chooses to have them so (for intimidation purposes, if nothing else).
  • Unequipping – Take an item in play from your equipped items, belt or spellbook and place the card in your hand.
  • Selling an Item – When selling an item players take a card from their hand, reveal it to all players and collect an amount of gold equal to half the card’s cost.  This can be represented in any fashion (coins, paper and pencil, tokens, etc).  The sold card is placed on the bottom of the store’s inventory. Any card without a cost can be sold for 200 gold. Cards can not be sold to gain a level.
  • Take a Peek – Look at the top card of your backpack. Then put it back.
  • Fighting a Revealed Dungeon Boss – It takes no action points to challenge the dungeon boss if it has already been revealed.
  • Using a Go Up A Level Card – The player reveals a Go Up A Level card, then shuffles it into the store inventory.
  • Stuff an Item – Take any number of cards from your hand and shuffle them into your backpack.
  • Place an Item – Place one card from your hand on top of your backpack.

1 Action Point

  • Throwing an Item/Casting a Spell – The player uses one of the items on his belt or in his spellbook, usually to affect combat one way or another.  The used card is placed in the player’s discard pile.  Players can take this action during other player’s turns, but only if they have the required action points.
  • Buying an Item – A player may spend his accumulated gold to buy an item from the store.  When an item is purchased, the player has the option to equip the item immediately (if he has a slot available to do so) or to place it on top of his backpack.  The store’s empty slot remains empty until the end of the round, when it is replaced with a new card from the top of the store inventory.  Items without a gold cost can be purchased for 400 gold.
  • Frantic Searching – Shuffle your backpack and then draw 1 card from it.  
  • Gift Basket – Pay 300 gold to shuffle the store inventory, then place the top card on top of your backpack, without looking at it.
  • Trapping the Boss – Players may put curses or monster enhancers on an unrevealed dungeon boss. These cards may be placed face down on the boss at the time they are cast. Once the dungeon boss is revealed, these curses affect the one who revealed him, then are discarded as normal. The monster enhancers then attach to the dungeon boss. Once the dungeon boss is revealed, players can still trap it, but must do so by placing the spells face up on the boss. 

2 Action Points

  • Careful Searching – Draw 3 cards from your backpack.  Choose 1 and put it in your hand.  Shuffle the remaining two and the rest of your backpack together.
  • Looking For Trouble – A player can play a monster card from their hand and fight it as normal.

3 Action Points

  • Open a Door – The player draws a card from the dungeon face up, revealing it to all players.  If it is a monster, the player must fight it or run away.  If it is a curse, the player is affected by it.  
  • Reveal/Fight the Dungeon Boss – A level 10 player may reveal or fight the Dungeon Boss.  Details for revealing or fighting the Dungeon Boss are listed below.

4 Action Points

  • Recycle – Shuffle your discard pile into your backpack and draw a card.
6 Action Points
  • Retrain – Choose a new High stat, Medium stat and Low Stat.  The effects of these changes do not take place until the end of the round.
7 Action Points
  • Polymorph the Dungeon Boss – The Dungeon Boss can only by polymorph if it has been revealed.  The player takes the current Dungeon Boss, as well as any monster enhancers and permanent effects on it and shuffles them all into the Dungeon.  Then flips the top cards of the dungeon until a monster card is revealed.  This monster is the new dungeon boss and works as though it had just been revealed as normal, although the current player does not get to fight it when it is revealed.
END OF ROUND

At the end of each round, the store gets new items in stock.  Roll a die and from the side closes to the store inventory, count across, taking the card which is chosen, shuffling it into the inventory and replacing it with the top card. Because the old card is shuffled into the inventory before a new card is chosen, it is possible to pick the same card.  Do this twice at the end of each round.

When getting new inventory, if a card was purchased this turn, roll for new inventory first, rerolling on any sold cards (empty slots) then replace sold inventory after.

Each player goes back to having 5 action points, unless his Intellect or level would force him otherwise.

The player sitting to the left of the player who currently started the round now begins the next round.  Thus the player who went second in the previous round will go first in the upcoming round and the player who went first in the previous round will go last in the upcoming round.

COMBAT

When defeating a monster, players don’t get treasure.  They get gold instead.  For each treasure a monster is worth, a player gains 200 gold.  Levels are gained as normal.

Players are able to use the Throw Item and Cast Spell actions during other player’s combats.  Typically this is done to make the combat more difficult for the player, but not always.  Players are allowed to ask for help from other players.  This works just like it does in Munchkin proper.  However, with no treasures to pull, players will have to decide how to split the gold, rather than split the treasures.

PLAYER DEATH

Whenever a player dies, the player’s 3 most expensive items are placed on top of the store inventory pile. The remaining items are dealt to the remaining, living players. Starting with the player to the dead player’s left, each player picks a card from either the dead player’s equipment, belt, or spellbook.  Each living player only loots one card from the dead player.

At the end of the round, the dead player shuffles his discard and backpack together then draws 4 new cards, playing whatever he wants to immediately, even if it’s not his turn. His next turn is played normally.

Death functions otherwise the same as in normal Munchkin.

DUNGEON BOSS

Once a player reaches level 10, they are able to open the door to the dungeon boss.  The first player wishing to fight the Dungeon Boss is the one to reveal it.  When the Dungeon Boss is revealed, any traps or curses cast on it affect the player who revealed the Dungeon Boss and any monster enhancers affect the Dungeon Boss.  If one of the effects causes the player to no longer be level 10, they are still able to fight the Dungeon Boss, but will have to become level 10 again before they could make another attempt, if required.  The Dungeon boss functions exactly as stated on the card, however the monster becomes level 20 and its “Bad Stuff” becomes the player dies in addition to whatever other Bad Stuff it has.

Once a dungeon boss is revealed, it does not change unless a player polymorphs it.  A dungeon boss can not be persuaded to let players by, can not be poofed away, nor can it be plot deviced or made to go to lunch or anything else to be gotten rid of.  Once a dungeon boss is revealed, no game effect can get rid of it, short of killing it.  Additionally, each time the dungeon boss kills a player, the dungeon boss goes up 2 levels permanently.  If the players successfully run away, the Dungeon Boss does not gain levels.

While the dungeon boss is revealed, players can still fight other monsters by opening other rooms and dealing with the rooms as normal.  Any monster enhancers places on the dungeon boss are not removed after combat.  This has the potential to make the dungeon boss very difficult.  If the players decide the Dungeon Boss has gotten out of hand, they will have to resort to polymorphing it.  However, deciding who has to do the polymorphing can be just as difficult as killing an overpowered Dungeon Boss.

ENDING THE GAME

The game ends when the dungeon boss is defeated.  If a single player defeated the dungeon boss alone, that player wins.  If another player assisted in the combat, those players win.  The victory must be accompanied by a handshake.  Only upon completion of the handshake have both players won the game.  However, if either player shouts “Backstab!” before the handshake is completed, that player wins and the other player loses.  Double However, if both players shout “Backstab!” at the same time, they both stab each other at the same time.  Both players lose.

GLOSSARY / HELP

Action Point / AP – Each action a player wishes to take requires a certain amount of Action Points to be able to perform.  Typically, players have 5 Action Points each round.

Backpack – The pile of cards from which each player draws.  Each player has their own Backpack.

Dungeon Boss – The monster the players must defeat in order for someone to win.  The Dungeon Boss is always base level 20, even if the actual monster card states otherwise.  Any monster enhancers placed on the Dungeon Boss remain even after the combat is over.

Grenade – Any one-time use card which grants a numerical bonus to a die roll.

Monster Enhancer – Any card that modifies the level of the monster. i.e. Ancient, Intelligent, Baby, etc…

Round – A cycle of each player taking a one turn.  Some game effects happen at the end of each round.  The player who takes his turn first in each round moves left each round.

Spell – Any door card that has an effect, i.e. curse, trap, monster enhancer, etc…

Stat – A player’s Strength, Agility or Intellect.

Stat Bonuses
High Strength – A player who has a High Strength stat is given bonuses when he uses weapons.  For each hand he uses in combat, he gets a +1 bonus.  For example, if he uses 1 weapon which uses 1 hand, he gets +1.  If he uses 1 weapon that uses 2 hands, he gets +2.  If he uses 2 weapons, each using 1 hand, he gets +2.  Additionally, he is granted an additional hand slot to use for whatever he’d like.  Similar to the Cheat card, he is allowed to use a 2 hand weapon and a 1 hand weapon together.  This would give him +3 from his High Strength.

Medium Strength – A player with Medium Strength begins the game with 1 level more than he would normally have.  Typically, this will start a player with Medium Strength at level 2.  However, for example, a player with Medium Strength who was also a Cyborg from Star Munchkin (whose minimum level is 2), would have a minimum level of 3.

Low Strength – A player with Low Strength has his maximum hand size (how many cards he can hold in his actual hands) reduces by 1.  This has no effect on how many weapons his character can use at any one time.

High Agility – Any grenade a player with High Agility uses has any bonuses granted by it doubled.  Therefore a grenade which grants +4 to either side, instead grants +8 when used by a player with High Agility.  If, for whatever reason, a player does not wish to have double the bonus from his grenades, he can have them function with their normal bonus.  Additionally, a player with High Agility has 2 extra belt slots, which can be used to hold more grenades.

Medium Agility – All players without Medium Agility must place their grenade cards face up when equipping them to their belt.  However, players who do have Medium Agility can equip them face down.  This allowed the player more secrecy in what they are able to throw into the combat.  Additionally, since there’d be no way to prevent it anyway, players with Medium Agility are allowed to place any item card they’d like on their belt, so long as they at least pretend it’s a grenade.

Low Agility – A player with Low Agility has a -1 penalty to any attempt to Run Away.

High Intellect – A player with High Intellect is granted an additional Action Point each round, totaling 6 normally at low levels.  Additionally, they are granted 2 extra Spellbook slots to use for any curses, traps or monster enhancers.

Medium Intellect – A player with Medium Intellect can spend 1000 gold at any point when he would be able to buy from the store to go up a level.  He can not use this ability to go to level 10.

Low Intellect – A player with Low Intellect has 1 less Action Point per round, totaling 4 normally, at lower levels.

Special Abilities
MUNCHKIN RAGE!!! – This special ability is activated any time the High Strength Munchkin is in combat for whatever reason.  Activating this ability adds a +30 bonus to the Munchkin’s combat score.  However, this tires the Munchkin.  In his next combat, that Munchkin’s level is considered to be -5.  Any other modifiers (such as weapons, grenades, etc…) apply normally.

Bait n’ Switch – This special ability can be used anytime a Munchkin with High Agility is in combat as the main combatant.  This ability can’t be used if the Munchkin is helping another player.  The Munchkin (known here as The Jerk) leaves combat (as if he successfully run away) and another Munchkin of his choice (known here as The Sucker) takes his place in the combat.  The Sucker must deal with the monster as if the door had just been opened on him.  Combat continues as normal.  If The Sucker also has High Agility, he can also use Bait n’ Switch on another player, but not The Jerk, nor any other player who has used this ability during this combat.  After this combat (but not if The Sucker uses Bait n’ Switch to switch with someone else), The Sucker can spring open a door on The Jerk.  At any point during a combat where the Jerk is the main combatant, the Sucker may call revenge.  Combat pauses and the Sucker may flip over cards from the top of the Dungeon deck until he reveals a monster or play one from his hand.  The monster revealed immediately joins combat against the Jerk (as if Wandering Monster had been played).  The Sucker may only do this once.

Hidden Agenda – At any time, a Munchkin with High Intellect (known here as The Illusionist) may play a spell (monster enhancer, curse, trap, etc) face down on a player or monster (as appropriate).  He announces to the affected Munchkin (either the Munchkin being cursed or the Munchkin in combat with the monster being enhanced and known here as The Sap) what his spell’s affect is.  The Illusionist is encouraged to lie when announcing his spell’s effect.  The Illusionist is not required and is, in fact, not allowed to say the actual name of the spell on the card, only the effect is has.  The Munchkin being affected can either accept his fate and have the spell effect him has The Illusionist claims it does, or The Sap can challenge The Illusionist and flip the card over and takes that effect instead, better or worse.  If The Sap accepts the spell as it was claimed, The Illusionist takes the card cast face down and shuffles it into his discard pile.  The Illusionist can use this ability to cast a spell on himself or any monster with which he is in combat, however any player may challenge the spell being cast.  This ability can not be used while Trapping the Dungeon Boss.

ALTERNATE RULES

Packing Your Bag – For a more intense game, The players are to choose which cards are in their backpacks at the start of the game.  Choose one player randomly to choose first, then go in order, each player choosing 4 cards of either door or treasure or any combination of the two, until each player has 40 cards.

The Real Golden Rule – Once a player has defeated the dungeon boss, all players count their gold and total cost of equipped items, items on their belt and in their hand and counts each spell as 200 gold.  Whoever has the highest total cost wins.  He might not be the one who defeated the dungeon boss, but he’s richer than everyone else.  And isn’t that what REALLY matters?  In the event of a tie, whoever declares being the winner first, wins the game.

Bigger and Scarier (Probably) – Players begin the set up by specifically choosing the dungeon boss.  This should be agreed upon by all players prior to game start.

Last Man Standing – Once the dungeon boss is defeated, the real victor is the one who tells the king of the great victory.  As soon as the dungeon boss is defeated, the players all turn against each other and begin fighting one another.  A new round begins (shifting the starting player to the left as normal) then each player, on their turn, rather than open a door, can spend 1 AP to attack another player.  Combat begins between those two players as normal.  Other players can jump in on either side to aid one of the combatants.  During this point of the game monster enhancers can be used on players (yourself included) and will remain on that player until they are defeated.  After the combat resolves, the next player alive takes his turn.  This cycle continues as normal until one player survives.

AUTHOR’S NOTES
This hasn’t been play tested yet, but I’m hoping to get it out there.  I’ll be in an opportunity to test it pretty soon, I think.

The idea here was to give Munchkin a little more structure.  I do enjoy Munchkin a lot for the comedy and general play style, but as anyone who has played Munchkin knows, it’s a good way to make enemies out of friends.  In normal Munchkin it was too easy to screw your opponents and steal victory for yourself.  It was basically assumed the first person to reach level 9 wasn’t going to win, but the second person who did, had a much better chance, assuming the rest of the players were out of cards to use.
My hope is by limiting the amount of cards players can work with and by limiting the amount of actions they can do each round, it will add a little more balance to the game.  By not allowing players to throw everything they have at each other without limitation, it will require players to think a little more.  On top of that, by requiring players to equip grenades and spells before they can be used, the other players have a bit more of an idea of what they are up against.  This will make the disappointment of losing a battle slightly less so.  Typically, it’s not the losing which bothers people, it’s the not knowing it was coming.
Additionally, I’m adding a bit of customization to the game.  As I’ve stated previously, I’m a fan of customization.  It’s not a lot, but by giving the players the chance to choose stats, it will make each player less totally reliant on luck-of-the-draw equipment.  
In that same vein, the gold system allows players to stray further away from the luck over skill (which I’ve also gone over before).  The store allows each player equal opportunity to some of the equipment and everyone has a fair shot at it.  But in not getting rid of luck completely, players are still given a random grab-bag of equipment to start with.  Further, the system wherein the starting player in a round changes each time further pushes a balanced game.

Lastly, the Dungeon Boss idea was something I thought would be interesting.  The main idea came from Munchkin Quest, but with the added level that monster enhancers stay on the Boss, by adding them, you are only making it harder for yourself to win as well.  So the idea of throwing everything you have at the Boss might not be the best tactic.

As I’ve said, I was really trying to make Munchkin a more balanced game.  Less reliant on chance, which it was solely before.  Munchkin has some great cards, humorous ideas and would be great to play everyday if it wasn’t so frustrating to lose.  The hope is that by giving players options, having every player access to the same cards and by limiting how much you can screw over your opponents at any given time, Munchkin will evolve into a much more balanced, friendly game which won’t make people want to kill each other (outside of the game, at least).
Posted in actions, alternate, munchkin, new, revamp, rpg, stats, variant | Leave a comment

D&D Skill Variants

Over the years, I’ve incorporated a number of house rules into my Dungeons and Dragons games. While many of them are intended for 3.5 edition, they are pretty easily translated to 4th. I always liked a skill-focused D&D game. I felt like the skills were never as much a focus as I would have liked. Sure they are useful or even necessary in certain situations, but I like to make skills more involved. “What’s the point of making a Knowledge check if I’m just going to kill it anyway?” Before these variant skill rules, my answer would have been “…to know how to kill it faster?”. But now I can smile wide and say, “MONEY!”

Harvesting (Intended for 3.5)

Upon the defeat of any monster, the PCs are able to use their skills to take bits and pieces of the creature that someone, somewhere will want to buy. 
                Harvesting from a creature takes 1 minute per HD and at the end of the time spent, the one doing the harvesting makes a Knowledge check and gains their check result times the creatures HD in valuable organs, fluids, etc.  Any amount harvested from a living creature will decay at least somewhat or partially.  Each hour the harvested parts go without being sold or preserved in some manner reduces their worth by 2%, to a minimum of 50%.  Some of the pieces harvested will not be able to decay (nails, scales, etc) or simply won’t fully decay to nothing, so the amount harvested will never decay to being worthless.  The bits and pieces sold will most often be sold to a spell component or magic shop.
                Certain skills and class or race abilities will grant a synergy bonus to harvest from certain creature types.  When a player has 5 or more ranks in the listed skill, they gain a +2 bonus to harvest from the listed creature types.  If a character has both 5 or more ranks in the skill and the listed class ability, they gain a +4 bonus to the Harvest check.
                A ranger’s favored enemy bonus also applies to Harvest checks.
Creature Type
Skill Synergy
Ability Synergy
Aberration
Survival
Ability to cast or use a (Calling) spell or ability.
Animal
Heal
Wild Empathy Ability
Construct
Disable Device
Trapfinding Ability
Dragon
Heal
Having Sorcerer levels
Elemental
Spellcraft
Resistance or immunity to the appropriate elemental damage type
Fey
Heal
Save bonus against Enchantment effects
Giant
Heal
Dodge bonus against giants
Humanoid
Heal
Having the same subtype as the creature to be harvested
Magical Beast
Spellcraft
Having a familiar
Monstrous Humanoid
Heal
None
Ooze
Survival
Resistance or immunity to acid
Outsider
Heal
Ability to cast or use a (Teleportation) spell or ability.
Plant
Survival
Ability to wild shape into plants
Undead
Heal
Ability to channel divine energy (turn, rebuke, etc)
Vermin
Heal
Resistance or immunity to disease or poison

Research(3.5 or 4th)

The Knowledge skills allow a PC to read at a library and learn that way, instead of being restricted to their own knowledge. The size of the library gives the character a bonus to this check. A small library might have a bonus of +4. A local library might have +8. A large library would have +16 and an enormous library could have +24 or more. However, every 1 point of bonus the library has, the time to find the information increases by 2 hours.  Although, the PCs can opt to reduce the bonus to whatever they want, and thus reduce the time researching. This method, generally, won’t allow a PC to find recent news or the like, as that is not typically found in a library. If the PCs can use a library to help with the Knowledge check, it is called a Research check, meaning the PC can use either of these skills in conjunction with a library.  Researching allows a PC to make any Knowledge check untrained, however the PC must gain at least a +1 bonus from the library to do so. 
With a very large library, the time required to fully benefit from the library’s resources could take multiple days.  Each day, the PCs can research for 8 hours without penalty.  For purposes of researching for a long time, the rules are similar for attempting to forced march (3.5 PHB 164).  If the PCs don’t want to deal with Forced Research, they will have to spread the researching out over multiple days.  Any extra researching time spills over to the next day. 
At the end of each hour past 8, the researcher makes a Constitution or Endurance check, if he fails, he passes out.  If not, he can keep researching.  The DC is 10 + 2 per extra hour. The researcher is allowed to sleep during the time he is researching, while this will essentially waste his time, it resets his Forced Research count, allowing him to research a further 8 hours the next day without penalty.
Once the researcher has either passed out or drawn the bonus he wanted from the library, he makes his Knowledge check with the bonus from the library.  Regardless of how long he searched, or over however many days, he only receives one check.  He may take a 10 on the check but not a 20.  A portion of the roll is representative of simple luck to determine if the library has books on the topic to be Researched.
Lastly, the researcher cannot continuously research a single topic at a library, over and over.  At a certain point, he discovers the library simply does not have any information on that topic.  This point occurs when the researcher has drawn twice the library bonus from it, over however many checks.  For example, Tardok wants to research Blue Dragons at his local library (+8 library bonus).  He spends his first day researching for 8 hours, giving him a +4 library bonus.  He makes his Research check and unfortunately, he discovers nothing he didn’t already know.  He pushes harder the second day, researching for 12 hours, granting him a +6 bonus.  Again, he learns nothing new.  At this point, Tardok has drawn a total of +10 bonus from this library, over his two days of research.  When he tries again the next day, no matter how long he researches for, he will only gain a +6 bonus.  The library grants +8 typically, twice of which is +16.  Tardok has already gained a total of +10 from this library, so he only has +6 library bonus left before he has checked every book the library has that might contain information about Blue Dragons.  Any further researching at this particular library about Blue Dragons will not give any sort of library bonus.

Taunting (3.5 Only)

The Intimidate skill can be used quite well in combat. In addition to demoralizing an opponent, it is possible to send him into a reckless anger.  To do this, the one doing the intimidating, must make a successful Intimidate check DC equal to the targets HD + target’s Wis modifier, a negative modifier will lower the DC. If this check is successful, the target must then make a Will save DC equal to that of the Intimidate result. If this check fails, the target becomes reckless.  This is a mind-affecting, language-dependent, fear effect and takes a standard action.
A reckless character gains +2 Str, but ‑4 to AC and Will saves. The reckless character will focus his attention on the intimidater. This does not mean he will completely ignore all other attacks, but his focus remains on the intimidator. If a reckless character is being attacked from all sides, he will get himself to a better fighting position and then go after his target. The reckless character remains in that state until either he or the intimidator has been defeated, or he has been out of line of sight of the intimidater for a full round or 1 minute has passed since becoming reckless, which ever comes first. For example, if a fighter intimidates a wizard, then the fighter runs out of the room, the wizard will run after him. If the wizard spots the fighter in on his round, the reckless state continues.  If the fighter is out of line of sight, then the state ends.
Once an attempt has been made to make a character reckless, all further attempts from that intimidator to affect that target will fail for the next 24 hours. If the person being taunted is willing, they can choose to automatically be effected to gain the bonus to Strength.  It essentially becomes a pep-talk at that point.


Cheaper identify (3.5 Only)

While using detect magic, the caster must make a Spellcraft check to determine the school of the effect.  The DC for this is 15 + spell level for a spell or DC 15 + one half caster level for a non-spell effect.  If the caster of detect magic beats the DC by 5 or more, he also learns the subschool.  If he beats the DC by 10 or more, he also learns any and all descriptors the effect has.
However, knowing more about an item, reduces the cost to identify it.  The base cost to identify an item is 110 gp, 100 gp for the material component, 10 for the service charge.  If the caster already knows the school (and the item does not have a subschool) of the item, the material cost is reduced by 10 gp.  If the caster knows the school of the item, and the item does have a subschool, knowing the school reduces the material cost by 5 gp.  If a subschool is available and known, that reduces the price another 5 gp.  Each descriptor known reduces the material cost by a further 5 gp.
                Attempting to identify an item with incorrect knowledge of school or subschool or descriptor causes the identify to automatically fail with wasted components.


Posted in dragons, dungeons, skills, variants | Leave a comment

Elements of Greatness: Customizability

Customizability, for the sake of this reading, means anything that makes one player’s gameplay different from another.  Some games allow you to choose a character role before the game, while others let you change something as you play the game. Oftentimes, the latter is usually an item or power of some sort.

Customizable Games
There are many games out there that are very customizable.  People who tend towards customizable games often say the same sort of things as to why it is better than not having it.  The main argument is, obviously, that is allows players the chance to play how they would like.  Not every player is restricted to one style of play and they can approach victory by whatever means they choose.  This makes the game appeal to a wider audience while also allowing veteran players the chance to play a little differently each time.  This sort of customizability often comes as a character class or role.  In Arkham Horror, you choose your character from a wide selection, each with different abilities and player styles.  You can be a beat-’em-up fighter, spellcaster, gate-closer, or some balance of those or more options.  While the abilities themselves often affect the game only moderately (expect maybe in the case of Patrice Hathaway), it makes the player feel more in control of their gameplay, and they will have more fun because of it.  Even something as simple as getting to pick the character’s name or back story can help players feel more connected to their choice and they will have more fun because of it.

The other main argument for customizability is that no two games will ever be the same, for the most part.  When players are allowed to change themselves, it’s bound to affect the game itself, at least in some manner.  This prevents games from becoming stagnant and repetitive.  With the prices of board games, it’s important to have some replay value, at least until they come up with a GameFly for board games (that idea is currently patent pending… pending).  In Dominion, each player buys cards during the game to build their own deck to draw from.  The variety of cards the players have to choose from is chosen (or randomly determined) before the game.  When several of the cards allow players to take extra actions, you can be sure each turn will take a lot longer.  When most of the cards grant player extra money and chances to buy extra cards, you can assume the game will go by faster than it would otherwise.  Even if all the cards players have to choose from are the same as a previous game, because the players choose which cards they buy, the game still has the chance to play out very differently.

All silver clouds have a dark lining (or something like that) and customizable games do have some downsides.  When a game is customizable, often times the setup and playtime can take much longer than a non-customizable game.  When players have to sit and choose how they want to start the game or how they want to take their turn, things can slow down.  In those times when you’re just looking to play something for a little while, knowing you’ll have to spend time choosing a character or figuring out a strategy or building a deck can be disheartening.  There’s also the possibility to cause some fighting.  If a game has limited choice of options, players with the same favorite might have a hard time determining who gets to play it.  In Humans!!! , players have a choice of roles, and they are limited.  If multiple players want to be the Wrestler zombies, they have to decide between them who gets to be that role.  When a player is stuck with his Plan B, he likely won’t have as much fun.  Lastly, if a game is randomly customizable, players might get stuck with a choice they didn’t want.  In Munchkin, players randomly draw cards to determine their race, class and what items they have.  When players draw cards and get nothing they want (or worse, something they didn’t want) the game starts bad and often only gets worse. 

Non-Customizable Games
While the label might sound negative, non-customizable games have many advantages.  When every player starts the same, each player has the same opportunity to win.  When there are no choices to make and no chance for early opportunity, everyone has an even playing field.  Basically, when there’s less chances to have the some players become more powerful than other, things usually go much more smoothly.  In Settlers of Catan, all the players have the same ability to build, trade and prosper.  There’s no worrying about which class to take or which items to buy.  Every player is exactly the same, giving everyone the same opportunity to win.  The idea flows into the next main argument for non-customizable games.  When there are less choices to make, the game is easier to learn.  No one buys a game with the intent to play it alone (and if you do, you might want to check out this page).  If you’re trying to introduce someone to a new game, pulling out a huge instruction manual and giving them a dozen things to choose right off the bat is very nerve-wracking.  When a game is easier to learn, more people are going to be willing to give it a try.  For new players to any customizable game, it is a common occurrence they forget some ability they might have that other players do not.  Having to remember your unique abilities (even if you have some reminder) can be an added complication some people simply do not like. 

Not everyone likes a long, detailed game.  Sometimes it’s nice to turn your brain off and just kill some zombies.  That being said, Zombies!!! has no real customization to speak of and that makes it fast to setup, easy to play and fun to finish.  With no choices to worry about, players are never more than a few minutes away from zombie killing fun.  Non-customizable games often are much easier to turn into travel games.  Whether you have the actual “travel version” or just carry the box around with you, less choices means less stuff.  Less stuff means more portability.  More portability means more chances to play.  Non-customizable games are simply simpler to play overall.

Variety, however, is the spice of life and lacking it can make things repetitive.  When each player starts the same and stays the same throughout the game, there is a good chance the game will play out just as another has before.  If the players don’t have some opportunity to give themselves an edge over more veteran players, the better players will often times continue winning.  If the veteran players have found a strategy that works, without some chance to change how the game plays, the newer players are often stuck in second place until they can find a good counter-strategy.  New players to any game tend to not like losing over and over, and if that is the case, they are likely to not want to play anymore.  Then you and your winning strategy have no one to play with.

Conclusion

I feel safe saying while most games are still good without too much customization (and they certainly should be discounted for not having), great games have some elements of it.  While a non-customizable game has many advantages over customizable ones, the replay value and play style options that come with customizability are too much to overlook completely.  If you want to get your money’s worth, you’re best going after a game with customizable aspects.  Those games are usually the ones you’re likely to play over and over.  There are, of course, exceptions.

I tend to prefer the customization over not.  Granted, while it may be harder to bring new people into the game and may take longer to setup, the end result tends to be better.  I have a good number of games I don’t play very often.  Key to the Kingdom is a lot of fun to play, but with no ability to customize it, it becomes boring playing over and over.  Each player is exactly the same, and so after playing once or twice, the game doesn’t really bring anything new to the table.

Previously on Elements of Greatness: Skill versus Luck
Next time on Elements of Greatness: Backstabbing

Posted in arkham, catan, Customizability, dominion, Elements, Greatness, horror, humans, key, kingdom, munchkin, zombies | Leave a comment

Catan Horror (v0.3)

A Combination of Arkham Horror and Settlers of Catan
(Updated 11 AUG 2014)

Required: Arkham Horror, Settlers of Catan, and Settlers of Catan: Cities and Knights
For sake of simplicity, “Town” can mean any settlement, city or metropolis.

Danke, Spielbox!


Game Changes
Catan Horror functions mainly as Settlers of Catan, with the added monsters from Arkham Horror.  However, there are several game mechanics which are removed from Settlers of Catan, while playing Arkham Horror.  There is no barbarian invasion from Cities and Knights.  Remove the barbarian advancement tile from the game.  However, the invasion die must still be rolled to determine when the players can draw production cards.  Knights can not be built by spending a wool and an ore, they can only be recruited.  Knights never have to be activated, so there is no cause to spend a wheat to ‘activate’ any knights. Special Building Phase is always available to the players, regardless of the number of players playing the game.  This means any player may build (but not trade nor use Knight Actions) during the Wrap Up of each other player.  Note this means that promoting a knight is possible during Special Building Phase, but recruiting a new knight is not.

Set-up
The game is played on the Catan board, which is set up like normal.  If there are extra terrain hexes available, play without a desert.  Otherwise, play with the desert as normal.  Remove any 2s and 12s available from the production chits.  Replace them with any other random number, except 6 or 8.  If extra production chits are not available, use some other marker to indicate the production value of that hex.

Each player places a settlement and a road then a city and a road , as per normal Settlers of Catan rules.  

The game starts with 2 open gates.  After all towns are placed, roll both die, re-roll on 2, 6, 7, 8 or 12.  The resulting number indicates where the first gate opens.  During the initial setup, no gates will open on a 6 or an 8, but gates can open on those numbers later during the game.  If there a multiple production chits showing the resulting number, determine randomly where the gate starts.  Repeat the process to determine the location of the second gate. 

Once the towns, roads and gate are all in place, players draw starting resources from their city and place a Basic Knight unhidden on their city.  Players also get a free city wall for their city.  Players do not draw resources from hexes covered with a gate.

After that, 1 monster is placed at each open gate.  

Knight Cards
It is required for players create a Knight card (or use the sample provided) to keep track of all their knights.  Since each knight has separate Health, Sanity and Madness it can be difficult to keep record of everything accurately.  It is further recommended players mark their knights of the same rank to differentiate between the two of the same rank.  This can be done with a piece of removable tape or a marker for a more permanent solution.  It is up to the players how they would like to handle this. 

Sample Knight Card


Gameplay
Each game turn is comprised of the player’s turn first, then a monster turn, then a wrap up.


Player Turn Order
1. Knight and Town Combat/Hide
2. Production Roll
3. Build/Trade/Knight Actions

Monster Turn Order
1. Monster Movement/Monster Attack
2. Invaded Towns Take Damage
3. Mad Town Monster Production
4. Sanity Damage to Active Knights in Mad/Invaded Towns
5. Remove Madness from Active Mad Knights

Wrap Up
1. Recruits/Militia Appear
2. Special Building Phase

Knight and Town Combat/Hide
Any monsters in the same location as unhidden Active Knights go through combat during this phase.  Hidden Knights must make a Hide check or be found and combat begins.  Any monsters which are assaulting a city make their attacks during this step.

Production Roll
The Production Roll for gathering resources is as normal.  However, any town currently Invaded does not draw resources.

Build/Trade/Knight Action
Building and Trading works normally.  Players can buy and trade with other players as often as they’d like during their turn.  Players are allowed to trade, build and use their knights in any order and as often as they have the capacity to do so.  Each player only has 3 Actions to use among all of his knights combined.

Roads are not under the control of any one player.  They benefit all players and any player may use any other player’s roads as though they were their own.  This counts for production cards like Diplomacy, as well.

Because of the potential to have settlements destroyed, it is possible for players to have roads with nothing connected to them.  In this case, players can no build any new settlements on that road segment.  For a player to build anything, the location of the build must be connected to one of that players sane towns, via any players’ roads.

Basic Knights can not be bought.  They can only be acquired by Recruiting or Militia.  Knights are still promoted by spending a wool and an ore.

Each turn a player gets to take a total of 3 Knight Actions, they can be split up however they want, among as many or few knights as the player wishes.  Knights may take the same action multiple times a turn, assuming the player has enough Knight Actions.  Knights to do not have to be activated to take actions.  In fact, knights can not be “Active” or “Inactive” at all; They are always “active”.

Knight actions:  Move, Attack, Calm, Repair, Raze, Hide, Recruit, Form Squad, Rest, Harvest, Colonize


Move
A knight may take the Move action and move a number of intersections equal to his strength.  A knight’s movement is not restricted to roads.  If the knight is unhidden, he can move one further intersection.  Movement along a road counts as 1/2 of an intersection for purposes of how far a knight can move.  A knight with 1/2 of an intersection of movement left can not move along a border with no road.  Roads are not strictly controlled by any one player.  Therefore knights can move freely over any players roads.

A knight does not have to use all of his movement in one Knight Action, but a player can not move one knight some of that knight’s movement, then take another Knight Action, then use the remainder of the first knight’s movement.  

Knights can move over and through opposing knights and may even share locations.  Knights can not displace opposing knights.

Attempting to move out of the same location as a monster requires a Hide check, as detailed below.  This does not cause the knight to become hidden.  It only allows him to move away from his current location.  Failure means the knight is being pursued by the monster and is making no progress.  All his movement from that Knight Action is wasted, but he may try again by using another Knight Action.  Knights in the same location as Evasive monsters do not have to make a Hide check to avoid that monster.

Attack

A Knight may initiate combat with any monster in his location.  Initiating combat gives the Knight the advantage that he attacks first.  Otherwise, the monster attacks first.  Additionally, anytime any knight takes the attack action, he is always guaranteed at least one attack die during combat, regardless of the difference in combat strength between himself and the monster.
Calm
A knight may use an action to calm a town down from a maddening ordeal.  A number of Horror damage is removed from the town, equal to the knight’s strength.  A knight can not Calm an Invaded town.

Repair
A knight may use an action to rebuild a town after it has begun to fall apart.  A number of Structural damage is removed from the town, equal to the knight’s strength.  A knight can not Repair an Invaded town.

Raze
A knight may take the Raze action to deal Structural damage to the town he is in, equal to his Strength.  This can be used to destroy Mad cities, keep a Structurally damaged town from going Mad by destroying it before it does (the lesser of two evils, most of the time) or to attack another player’s town (for any reason).  To Raze a Mad town or a town of an opposing color, a knight must make a Raze check, as described below.  Sane towns of the player’s own color do not put up a fight.

Raze Check
To perform the Raze action on a town, a knight rolls a die, adding his strength to the roll, and subtracting from the roll based on the size of the town.  Subtract 1 for a settlement, subtract 2 for a city and subtract 4 for a metropolis.  A knight must get a result of 5 or greater on the Raze check to perform the Raze action.  If the knight succeeds, he deals his Strength in Structural damage to the Mad town. If the knight fails the Raze check, the mad citizens are stopping the knight at every turn and no damage is dealt to the town, and the Action is wasted.

Hide
At the start of each turn or whenever attempting to move out of an intersection with a monster, a knight may take the Hide action to hide form the monster and avoid combat,  First make a Hide check, as detailed below.  If the knight succeeds, flip him to the black and white side.  While hiding takes a knight’s action for the turn, becoming unhidden does not take an action and can be done at any point during the controlling player’s turn.  This does not apply to Evasive monsters.  Evasive monsters have to be found before they can be fought.  The same method knights use to Hide is used to find Evasive monsters.

While hidden, a knight loses the extra movement bonus that comes with being unhidden, however he is less exposed to the monsters.

Hide Check
If a knight is hidden while in a town with a monster or in the same location as a monster, he must make an Hide check, succeeding on a 5 or 6, if he wishes to avoid the monster. He adds his strength to the roll and applying the monster’s awareness  So a Basic Knight (1 Strength) hiding from a Byakhee (-2 Awareness) would have a -1 Hide modifier.  He still needs a 5+ to hide successfully, so he needs to roll a 6.  Failure indicates he is found and combat begins.  If any Knight is found, other Knights within the city or same intersection can immediately join the combat, if they wish.  Any Knights in combat are immediately unhidden.

Hide checks made in any town (Sane, Invaded or Mad, of the same color or not) grant a +1 bonus to the knight’s Hide check, thanks to the cover the buildings provide.


Recruit

A Knight who is at least Strong can Recruit from any Sane town of his color.  The player puts a Basic Knight (and only ever a Basic Knight) into play in the same location as the Knight who took the Recruit action.  Only one Knight can be Recruited from each town, each turn. The new recruited Basic Knight appears at the end of the player’s turn.

Form Squad / Join Squad
A Strong or Mighty Knight may form a squad with any other weaker Knights in his location and of the same color.  Knights can not form squads with Knights of an opposing color.  Once a squad is formed, other knights may join it by using the Join Squad Knight Action.  While in a squad, the whole squad works together to perform any action using only 1 Knight Action.  Therefore, with only 1 Knight Action, the whole squad can be made to move.  However, the squad moves only as fast as its weakest member.  Similarly for Hide checks, although the strongest knight is used as the squad’s modifier.  Although, for any other strength based Knight Action, the strength of all Knights in the squad are added together.  A squad of 1 Strong Knight (2 Strength) and 2 basic knight (each 1 Strength) could Raze a town and deal 4 damage to it.  Once a squad is formed, it can not be disbanded.  Only when a knight dies is it removed from the squad.  When assigning damage to a squad, the lowest rank knights must be killed first.  The stronger knights can take damage, but they can not be killed before the weaker ones.  Any action that can be taken by a single Knight, can also be performed by a Squad.  However, if any rule or Action specifically states the strength of the knight with a rank (Basic, Strong, Mighty) a squad can only perform that action if they have a knight of that strength within the squad. If an Action states the required strength as a number (“A knight with strength 3 or greater…”) the squad only needs to have that much strength, regardless of actual rank.  

When in combat, squads get a bonus to their combat strength equal to the number of members in the group.  
For example, a squad of 1 Basic Knight and 2 Strong knights has a combat strength of 8.  The Basic knight gives 1, each Strong knight gives 2 and there are three members in the group, which gives another 3.  1 + 2 + 2 + 3 = 8

If a member of a squad is killed or goes Mad, he is immediately removed from the squad.

Rest
A knight which has sustained damage and survived may spend a Knight Action to remove 1 damage and 1 sanity.  If part of a squad, only 1 member gets to restore his health and sanity with each Rest action.  The player must spend 1 wheat each time this Knight Action is taken by his knights.

Harvest
A player may spend two Actions to have his knights Harvest with a Knight Action.  A knight may harvest resources from any hex to which he is adjacent.  If the strength of the knight is 3 or greater, the Harvest action draws two resources.  The two resources drawn do not have to be from the same hex.  For example, a Mighty Knight could use the Harvest action to draw a lumber and a grain, assuming he was adjacent to a mountain hex and a field hex.

Militia
Any player (even one with no knights) may spend 3 Knight Actions to enact a militia.  This places a single Basic Knight (and only ever a basic knight) in any non-Mad town of the player’s choice that he controls. Those knights gained through Militia appear at the very end of the player’s turn.  If the player has no remaining Basic knight tokens, he may not enact a militia.

Colonize
A player may use 3 Knight Actions, demote a knight (or remove that knight from the board if it is a Basic Knight) and pay the cost of a settlement to colonize at that knight’s location.  The player places a settlement in the same location as the knight which performed the Colonize action.  The new settlement does not have to be connected to any of the player’s roads, but must still adhere to the proximity rule of no towns may be within 2 intersections of each other.

Mad Knights
Knights take Sanity damage each turn they remain in a Mad or Invaded town.  Each knight can take 1 more than his strength in Sanity damage before going Mad.  Once a knight goes Mad, he is treated as a monster for a set duration, at which point his mind returns to normal, clear of any madness.  A knight goes mad for a number of turns equal to 5 minus his strength.  So Basic knights can take 2 Sanity damage and go Mad for 3 turns.  Strong knights can take 3 Sanity damage and go Mad for 2 turns.  Mighty knights can take 4 Sanity damage and go Mad for 1 turns and Generals can take 5 Sanity damage and also only go Mad for 1 turn.

Once a knight has taken enough Sanity damage, he immediately goes Mad and is counted as a monster.  He joins in any attacks on nearby cities or knights as a normal monster would.  He is considered a monster with combat rating and damage rating equal to his strength.  His Horror damage is 1.  He has normal monster movement and an Awareness of +0.  Mad knights will attack sane knights in his same location during the next combat phase.

Knights which are part of a squad that go Mad will break off of the squad and are removed from it.

Towards the end of each turn, his madness slowly wanes.  It should be noted on the player’s Knight Card how many turns have gone by and how close the knight is to regaining his sanity.  Once a knight throws off his madness, all Sanity damage is removed.  On the following turn he will be able to be used again as normal.

Gates
A hex with a gate on it does not produce any resources, much like if the robber were placed on it.

Opening Gates
Each time a 2 or a 12 is rolled during production, a new gate has the potential to open.  After the 2 or 12 is rolled, re-roll the dice.  The result indicates where the new gate opens.  Randomly draw a gate token and place it over the production chit.  If there are multiple production chits with the number shown, determine randomly at which hex the gate opens.  If there are no numbers on the board showing that number, a monster surge occurs.  Hexes already covered by a gate are not considered when opening a new gate.  Therefore a monster surge will only appear after each chit of a certain number is covered with a gate.  When a monster surge occurs, a monster appears at each open gate. 

Gate Monster Production
Each time a new gate opens, a new monster appears at that gate.  

When a monster appears from a gate, it is left on the center of the hex until it moves.  When determining where the monster moves, it is considered to be on every intersection of that hex.  So, the monster would be able to see every city 2 intersections away from that hex, because a city has Illumination of 2.

Closing / Sealing Gates
To close a gate requires knights to take the Attack Knight Action.  Only one knight (or squad) attacks for each Attack action.  Each gate can take 10 damage before closing.  The knight deals damage equal to his strength minus the gate’s difficulty rating.  In this instance, some gates will add to the amount of damage they take with each attack.  Gates can accumulate damage over several turns.

When a gate is closed, it is removed from the board and placed back into the gate token draw pile.  A gate closing has no bearing on the monsters of the same gate symbol on the board.

Immediately when a gate is closed, and not any point after, the player who closed the gate may spend a clue token to seal the gate.  Place an elder sign token next to the production chit.  No gates may open on the hex for the remainder of the game.


Monsters and Mad Towns

Monster Movement
Each Monster Move phase, each monster has the potential to move.  For each monster, roll a die.  On a 4+, the monster moves.  Otherwise, it does not.  Red bordered monsters (Fast monsters) move on a 3+.  Yellow bordered monsters (stationary monsters) never move.

When determining where and how a monster moves, it is important to know what it can see.  Settlements have an Illumination of 1, Cities have an Illumination of 2, Metropolises have an Illumination of 3.  If a monster is within an a number of intersections of any town’s Illumination, when that monster moves, it will move towards that town. Monsters will go for the closest town first, or smallest sized town if several are the same distance away.  If all other things are the same, determine randomly towards which town the monster moves.  A monster will never choose to move toward a Mad town and ignores them completely.

It is possible for a monster to move towards a city or metropolis and, in moving towards it, will see a smaller town.  The monster will then move towards the smaller town the next time it moves.

If there is no town in sight and a monster is in an adjacent location to an unhidden knight, the monster moves to the town or knight.  If a turn starts with a monster in the same intersection as a hidden knight, the knight must make a Hide check or fight the monster.  Monsters always favor chasing towns over chasing knights if both are in view.

If there are no towns or knights in sight, monsters will move randomly. Monsters move one intersection in a random direction.  Each time a monster has to move randomly, number the three intersection boundaries to which the monster is adjacent, numbering one of them with 1-2, the next with 3-4 and the last with 5-6 and roll a die.  The monster moves along that intersection boundary.

Special Monster Movement
Fast monsters (red border) move two intersections each time they move.  When moving randomly, roll for each intersection moved.  Flying (Blue border) can move over water freely (see Adding Expansions in the Appendix) and always move to the closest (or then smallest) town, regardless if that town’s Illumination.  Aquatic monsters (Orange border) can also move over water freely, but otherwise move normally.  Stationary monsters (Yellow border) never leave the location they are created in.  Stalker monsters (Purple border) always move to the closest Knight and are always aware of where the closest knight is.  Monsters with special movement (Green border) are often best to be discarded and a new monster put in its place, but some work well.  See Special Movement Monsters in the Appendix.

When determining if a move is closer to a monster’s target.  Count the number of intersections between the monster and ts target.  If the move reduces the amount of intersections between the monster and its target, the move brings it closer.  If the amount stays the same, the move is not closer to the target.

Mad / Fallen Towns
At a certain point of taking too much damage, a town will go Mad or fall.  Each level of town can take different amount of damage before sustaining any penalties.  A settlement can take a total of 5 damage before it becomes Mad or falls.  When a city takes 10 Horror damage, it goes Mad.  When it takes 10 Structural damage, it is reduced to a settlement and 10 Structural damage is removed.  A metropolis can take 20 Horror damage before it goes Mad, but at 15 Structural damage, it is reduced to a city and 15 Structural damage is removed.  Mark a town as Mad on the town card.  When a town goes Mad, any Structural damage it has sustained remains until Repaired or Razed further.  If a town is ever demoted and the amount of Horror damage it has is now over the limit of its new demoted Horror damage limit, it immediately goes Mad.

A Metropolis which is reduced to a city can be rebuilt by any player by spending 4 of the appropriate commodity, or 5 of the commodity if the last city improvement has been built by the player controlling that Metropolis.  

Once a monster has caused a town to become Mad or Fall, it ignores the town and finds new targets, moving as normal.

A Mad town must be destroyed to stop its production of monsters.  Once a town becomes Mad, it is beyond saving.  Knights must use the Raze action while in the Mad town to destroy it.  However, the citizens of the down will resist the knight’s attempt and the knight must make a Raze check.  Any and all knights who end their turn in a Mad town take 1 Sanity damage.  If a squad is present in an Invaded or Mad town, each knight in the squad takes 1 Sanity damage.  This should be noted on his Knight Card.

Mad Town Monster Production

At the end of each turn, each Mad town rolls a die.  If that settlement rolls a 5+, they produce a random monster.  If a Mad city rolls a 4+, they produce a random monster, redrawing if the monster’s toughness is less than 2.  If a Mad Metropolis rolls a 2+, they produce a random monster, redrawing if the monster’s toughness is less than 3.

Combat

Combat is done similar to the rules for Arkham Horror.  The combat strength of the knights is compared to the combat strength of the monsters.  The resulting difference shows how many die the player gets to roll.  For every 5 or 6 shown, a hit is scored by the knights.  Combat strength of the knights is their knight strength.  Basic knights have 1 combat strength, Strong knights have 2 and Mighty knights have 3.  Combat strength for monsters is equal to their combat damage (the number of heart icons in the lower right).  The Horror damage for monsters is shown by the number of blue circles in the lower left of the monster tile.  The combat and sanity ratings (the red and blue numbers) are not used in Catan Horror and can be ignored.  Monsters have health equal to their toughness (the blood drop icons in the bottom center).

Beginning Combat
When combat begins, only the current player’s knights will engage in combat.  All knights in the same location as a monster will enter combat.  As soon as this happens, the player has several options.  If a knight is already hidden, he can make a Hide check to avoid combat.  If a knight is not already hidden, he can not hide now.  Each knight who enters a fight can band together with every other knight in his location to combine their combat strength. 

Attack Action
A Knight who uses the Attack action rolls his attack first, with other knights in his location.  Otherwise, the monsters get the first attack.
Evasive monsters are not counted for this unless they have been forced into combat by being found with a Hide check.

Monster Attack
Every combat, every monster will make an attack individually.  Monsters automatically deal damage each time they attack.  Monsters deal damage to the knights in the same location as them equal to their combat strength.  Monsters do not ‘spill over’ extra damage from dead knights onto others.  If a monster with 4 combat strength kills a Basic knight, 1 damage is dealt to the Basic knight (which kills him) and the remaining 3 damage is not dealt to any target.  In some cases, it is advantageous to the player to ‘sacrifice’ their weaker knights to save their stronger ones.  Damage is distributed among the available knights in the combat, as the current player decides.  
Note rules for dealing damage to a squad are different, as listed in the Form Squad section above.  Knights do not take Sanity damage from combat.

Knight Attack
When knights attack, they get to choose which monsters to fight.  If multiple monsters are in the same location, the player must choose which monsters to have his knights engage before rolling, even if those monsters already got an attack on the knights.  The combat strength of the monster is subtracted from the combat strength of the knights to determine how many die the player may roll for their attack.  For example, a Basic knight and a Strong knight are in the same location as a monster with 2 combat strength.  The knights have a combined combat strength of 3 (Basic has 1, Strong has 2).  The combat strength of the monster is subtracted from his, resulting in 1.  So, the player gets to roll 1 die.  On a 5 or a 6, the knights score a hit on the monster and deal 1 damage to it.

Weapon Immunity/Resistance
If a monster is immune to a certain weapon type, knights using that weapon count for 0 strength.  If a monster has a certain resistance to a weapon type, that knight is counted as having half of his actual strength.  When determining the strength of a knight group for combat, add all knight’s strength together (including halves), then round down.

Weaponry
Basic Knights only have Physical Weapons.  Strong Knights only have Magic Weapons.  Mighty Knights have both and can choose which to use.

Only one round of combat is done each turn.  The monster gets 1 attack and the knights get 1 attack.  When they can take actions, knights are free to run away from a monster as normal, or stay and fight.

Squad Combat
Squads are much more effective in combat.  When attacking, a squad rolls a number of dice equal to their strength (remembering squads get combat bonus equal to the number of members it has).  For each monster the squad is fighting, they may choose which dice are lost to that monster’s combat strength and may use the resulting dice to determine their damage dealt to that monster. Squads to not have to decide which monsters to engage before making their attack roll. Knights can assign any dice they would like towards overcoming the monster’s combat strength.
For example, a squad of 2 Basic knights, 1 Strong knight and 1 Might knight (combat strength of 10, 7 knight strength plus 3 bonus squad strength) are in the same location as 3 monsters both with 2 combat strength and 2 health.  The knights roll 7 dice and get 6, 6, 5, 5, 5, 4, 4, 3, 2, 1.  The knights attack the first monster and assign the dice showing 1 and 2 to overcome the monster’s combat strength.  Then they use both 6s to damage the monster, killing it.  Then they use the 3 and one of the 4s to overcome the combat strength of the second monster and two of the 5s to kill it.  The remaining die show 4 and 5.  The knights do not have enough die to overcome the last monster’s combat strength to be able to damage it. So the knights attack ends.

Damaging Knights
Immediately when a knight accumulates damage equal to his strength, he is demoted to the next lowest strength and removes a number of damage tokens equal to his original strength as he is being demoted.  A basic knight dies if it is ever damaged.  Players can not assign more damage to a knight than he has strength combined through his demotions.  So a Basic knight can not be assigned to take more than 1 damage.  A Strong knight can not be assigned to take more than 3 damage at once and a Mighty knight can not be assigned to take more than 6 damage at once.  If a knight is demoted to a rank of which the player has no more tokens, that knight is killed instead of demoted.

Monster Trophies
Any monsters killed are kept as trophies by the player who controls the knights who killed the monster

Monster Assaulting a Town
At the start of each turn, monsters which are in the same location as a Sane town with defenses have to first defeat any and all defenses.  Defenses include knights and city walls.  During this time, the monster is considered to be ‘assaulting’ the town.  It has not gotten into the town yet, but if it does, the town is considered ‘invaded’.  During this time, the monster is running amok, destroying buildings and spreading insanity.

As soon as a monster enters the same location as a town, each knight in that location must choose how to respond.  Either stay and fight, stay and hide or flee.  A knight who chooses to stay to fight will enter combat as normal.  A knight who chooses to stay and Hide, remains in the town, but must make a Hide check as soon as the monster invades the city, entering combat with the monster if he is found.  A knight who chooses to flee moves to any adjacent intersection to the town.  

Any knights defending a town from a monster assault get one attack per turn, as normal.  While combating a monster assaulting a town they are in, knights score a hit on a 4+.  While in an Invaded or Mad town, knights hit on a 5+, as normal.


Nightmarish / Overwhelming
Each turn while a town is being assaulted by a monster with Nightmarish or Overwhelming, it takes Horror damage (or Structural damage) equal to the Nightmarish damage (or Overwhelming damage), even though it has not yet Invaded the town.

City walls can be sacrificed to negate an attack from 1 monster. The player who controls the town gets to decide which monster’s attack is canceled. City walls can not be discarded to prevent nightmarish or overwhelming damage. If no other defenses are present when the city takes any Structural damage, the city wall must be sacrificed.

Invaded Towns
If a monster gets to a town without any defenses, or defeats all the defenses, the monster has Invaded the town.  When a monster has Invaded a town, the citizens of that town are overwhelmed with madness and can not produce resources and do not count for victory points.  The town is no longer considered to be owned or controlled by the player.  Each turn a monster is invading a town, that town takes Horror damage equal to the monster’s horror rating and Structural damage equal to the monster’s combat damage.  Mark a town as Invaded on its Town card.

Repelling an Invasion

Knights can attack monsters in an Invaded town in an attempt to restore it to how it was.  At the end of each turn, any and all knights within an Invaded or Mad town take 1 Sanity damage.  If a squad is present in an Invaded or Mad town, each knight in the squad takes 1 Sanity damage.  This should be noted on his Knight Card.  By defeating all monsters in an Invaded town, the town is no longer Invaded.  However, any Horror and Structural damage it has sustained remain.

A knight who moves into an Invaded town may either take a Knight Action to Hide within the town and do nothing, waiting for more knights, or he may Attack the monster.  Note any Hide checks made within a town grant a +1 bonus to the knight’s Hide check.  If the Knight Attacks, any other Knights within the town may join the combat immediately.  Combat goes as normal, noting that the knights only hit on a 5+, since the town is now Invaded. 

Mad Players
If a player has all of their towns and knights become Mad, they themselves become Mad.  Mad players work against the remaining sane players.  Any other Mad towns on the board are replaced by the newly Mad player’s color.  If that player does not have enough settlement or city pieces, the player decides which towns to gain control of and the remaining towns function typically as Mad towns.
Mad players can not trade with sane players, but they may always trade to the bank at a 3:1 rate, following the same rules as a harbor, although it does not count as a harbor.

Monster Control
Mad players control the monsters during their movement steps and can choose to ignore the typical rules for monster movement.

Mad Knights
A Mad players knights become Mad.  However, as they function as monsters while Mad, they are still under the control of the Mad Player and can be fully controlled in this state.

Combat Rewards
Anytime a monster kills a sane knight, the Mad player draws 1 resource from the hand of the player who controlled the recently killed knight.
Anytime a monster destroys a settlement, the Mad player draws any 2 resources from the bank.

Gate Production
Anytime a 2 or a 12 is rolled, the Mad player rolls both die and can choose where, of the available hexes, to place the gate.  The Mad player may spend 1 wheat to reroll the die to determine where the gate could be placed.  The Mad player can only do this once per gate placement.

Monster Production
Mad Players can build monsters as they would build anything else.  Whenever a mad player controlled town has nothing being built within it, the player may take a random monster from the cup and place it on the town card for that town.  Each town can have 1 monster being built in it.  Monsters can take several turns to build.  Each monster takes more time and resources to build for each point of health it has.
Mad players must spend 2 sheep, 1 wheat and 1 lumber to add to the monster’s build.  Once a monster has been built towards a number of times equal to it’s health, it is completed and is placed on the board in the location it was built during the Monster Production step.

Multiple Mad Players
Once more than one player has become Mad, the Mad players divide their Mad towns evenly among each other, replacing settlement and city pieces on the board, if need be.  The Mad players may decide together how to divide the towns.
Once there are multiple Mad players, they may not trade to the bank at a 3:1 rate anymore, but they may trade with one another.  They still may not trade with any sane players.

Winning Conditions
Mad Players can not win from gaining the required number of Victory Points.  Mad players can only win by wiping the other players off the map.  Mad players win or lose as a team.

Starting as a Mad Player
Optionally, the players may decide to start the game with a Mad player.  This should be decided before the game begins.  The players can choose to decide which player begins Mad randomly, or one player may choose to start the game Mad.  It is suggested to start with only a single Mad player, but not a requirement.

Dead Players Become Mad
Optionally, the players can allow a player who has been wiped out to become Mad, instead.  If a player loses all of their towns and knights, rather than stop playing, they can become a Mad player instead. If a Mad player causes a sane player to be wiped out, it is recommended that the player does not become Mad and is removed from the game.  Because of this, Mad players will have to use some strategy in maddening sane players towns before destroying them.

Clue Tokens, Trophies and Generals
Clue Tokens and Monster Trophies
During any point when a player could normally build, they may spend 5 toughness worth of monster trophies for a clue token. Clue tokens may be spent to gain an extra knight action or to seal gates.

Clue tokens and monster trophies may not be bought nor traded.

While making any sort of check, a player may spend a monster trophy to gain a bonus to the roll equal to the monster’s toughness.  


Generals
Any progress or development card that does nothing but grant a player a victory point can be discarded (and not available to be redrawn for the remainder of the game) for a General.  This special unit functions as a Knight with strength of 4, but functions as a Mighty knight for all other purposes.  It should be represented with a Mighty knight piece, but with an extra marker to note its difference.  Players can not have more than one General, nor can they have a General and two Mighty Knights.  Players can not gain a General without the Fortress city improvement.  Players can gain a General regardless of the knights they do or do not control at the time.  The General can be placed on any sane city of the player’s color.
Ending the Game
If a player loses control of all his towns and knights, he is dead and no longer playing.  He can not be traded with and can not buy or sell anything.  He is lo longer considered in the game.  If the remaining players win after his defeat, they are the winners, but he is not.

If a single player has more than 10 Victory Points at any point during his turn, he has discovered a way to defeat the monsters once and for all, but must let his fellow Settlers fall in the process.  This player is the sole winner.
If every town becomes Mad, Catan has fallen to the Ancient Ones and the rest of the world is not far from falling as well.


If all Mad towns are destroyed, all gates closed and all monsters killed, Catan is free of the horrors which had plagued it and all the Settlers win.

Appendix / Glossary

Adding Expansions
It is possible to combine the base Catan Horror with the other expansions from both Settlers of Catan and Arkham Horror.  Some blend well with the base game, others do not.

Catan Expansions

Rivers and Seafarers
Seafarers and the Rivers variant from Traders and Barbarians would blend well enough with the base game.  However, it is highly recommended, if playing with multiple islands to ensure the two starting gates are not on the same island.  

If playing with Rivers, un-bridged river borders slow down monster movement.  Any non-flying or non-aquatic monster requires twice as long to cross a river.  If a normal monster attempts to cross a river, place it half way across (in the middle of the border section), then next turn move it the remainder of the way.  Fast monsters can also cross rivers in one turn, but only if they start their turn adjacent to it since it still requires them twice as much movement to cross it.

In Seafarers, monsters can move across shipping lines.  If a monster moves across a shipping line by either seeing a town across the water or by moving randomly, he continues to move in that direction until he reaches the other side.  The monster is stowing away on board the ship and can not turn around mid journey.  Movement at any splits in the shipping line would be determined as normal by looking for towns in the distance then knights, then randomly.  The monster will still never backtrack over a shipping line he has already taken, even by moving randomly at a junction.

Arkham Horror Expansions
Arkham Horror expansions don’t blend as well as Settlers of Catan expansions do, mainly because the game is mostly Catan with elements of Arkahm Horror.  Out of all the possible expansions which could be added, most would require too large of a rule change or doesn’t provide enough of a change to make the addition worth it.

Special Monster Movement
There are monsters in Arkham Horror which have a special movement method.  This is noted by a green border.  It is recommended if one of these monsters is drawn that it be discarded and a new random monster drawn instead.  Addition (or not) of these monsters should be agreed upon by all players at the start of the game.

Changelog

ver. 0.3
– Gates can’t start on 6 or 8.
– Monsters are considered adjacent to all intersections while on a gate
– Monsters move on 4+
– Remove 2 and 12 production chits.  Gates open on 2 and 12.
– Players start with city wall.
– Removed barbarians
– Only 1 monster ever appears, regardless of number of players
– Split Player and Monster turn
– Knights can Colonize
– Always get special building phase
– Clarified Knight Promotion as a build
– Attack Knight action guarantees 1 damage die
– Knights can Raze any city
– City walls negate an attack
– Can’t build on non-connected roads
– Gates won’t count covered hexes for opening a new gate and towards a monster surge
– Knights can flee an attacked town
– Clarified Combat
– Attack monsters separately
– Squads got much better at combat
– Players can become Mad

(ver. 0.2)
+ Added Gates
– Removed starting Mad towns
+ Added Mad Knights
– Knights can not Calm or Repair Invaded towns.
+ Wheat required for Rest Knight Action.
0 Specified/clarified many rules
+ Knights move further on roads
+ Added Appendix
+ Knights can now join an already formed squad
– Removed the robber
– Removed knight displacement
0 Fixed up the combat system for knights and towns
+ Knights gain a bonus to Hide in towns

Creator’s Notes
(Ver. 0.2)
I changed some stuff around to make it better to defend against monsters over trying to drive them out of a town.  Bonuses to Hide in towns and bonuses to attack towns you’re defending try and focus on that idea.

The Knight Card I made in MS Paint.  It’s not by any means a quality piece of engineering.  It’s just how I envisioned the cards to lay out.

I still haven’t gotten a chance to playtest this.  For two reasons, I recently moved and have only been to my LGS once since settling in.  And two, I gave away my copy of Arkham Horror.  Both of those things vastly impede my ability to play Catan Horror.

I want to thank Tom who commented on this post recently and revived my interest in getting it playable.  Also for a number (I assume) of his great ideas.

I did not realize how poorly some of these rules were written and laid out.  I really tried to give it a nice shine this time around.  A lot of the rules were clarified, edited or straight up removed.  I added a lot of new elements as well.

NEVER use the text highlight feature on Blogger.  It was only ruin your day (and your posts).  I am baffled at how badly this post was messed up before I could manage to post it again.  It somehow got all scrambled up.  Certain sections where completely misplaced in other sections.  It was mind-boggling.
————————————————————-
(Ver. 0.1)
I thought about letting knights go mad and they go spread madness and stuff, like Panic and Raze… but I figured they would basically just become monsters at that point.  Plus, it’s just an extra complication that the game didn’t need.  If you want to enact some rule like that and get it working well, I’d really love to hear about it.

I wasn’t sure about letting knight’s heal with the Rest action.  I can see it being abused with squads of a mighty and strong knights, all the damage going onto the mighty knight, then resting up for a few turns to heal.  But, I figure that’s kinda the point.  That’s a tough squad, they should be able to take some heavy punishment.

Also, I’m aware that the flow of this is kinda jumpy.  I reference things I don’t mention until way later in the post, but there’s not a lot I can do about that.  Just figured I’d mention it.

Also also, as of now, this hasn’t been play-tested at all.  So expect heavy changes pretty soon after the first play through.

As I mentioned, I haven’t play-tested this yet, but I haven’t posted in so long, I want to post it anyway.  I’m thinking there might be some glaring oversights on my part with some of the rules.  Primarily in the balance of the game and how things like combat work and how smoothly they work.

As of now, the turn order has a single player going through his full turn before moving onto the next player.  This might change later to be more like Arkham Horror where the turns are phase based, rather than player based.  However, the first player token would be used to indicate the only player with whom others players can currently trade.  


Possible Additions/Changes

Catan Horror Event Cards
In the Traders & Barbarians Catan Expansion, there is the opportunity for players to use Event cards in lieu of die for determining production rolls.  These cards also add an random element to the game by adding random events to the game, effecting the players when the card is drawn.

Special General Abilities
Rather than have the General just be a stronger knight, he may gain additional abilities.  There would be a list to choose from and the players would be allowed to choose the ability upon the time of creation of the General.  They’d also be able to change the ability by spending another victory point card or maybe just a clue token.

Mad Town Growth
I played with the idea of having a Mad settlement eventually grow into a Mad city, but considering it would require a player to give up a city piece, I didn’t think it would be playable without sacrificing either a a player’s city piece or setting aside an entire color just for Mad towns.
Posted in arkham, catan, combination, settlers | 6 Comments

D&D Web Resources

It’s been a while since I’ve had the chance to post anything.  For that, I pretend to apologize.  Rather than bore everyone with why I haven’t posted, I give you Filler Materials!!!

I’ve recently gotten a Dungeons and Dragons 3.5 Edition game in the works with some friends.  In my travels upon the Sea of the Internet, I found several websites that might interest people in a similar situation.

Anyone who has searched around for 3.5 stuff has probably seen this first page already.  It’s a page of all the open source information.  The Hypertext d20 SRD has the information available broken down into categories, rather than books, which is easier to sail around (in continuing with this Sea of the Internet metaphor).  For anyone wanting to find basic information about D&D 3.5, this is a great site.  It’s got all the basics laid out nice and simply.

The next page comes to us from our good friends over at everyone’s favorite online Encyclopedia, Wikipedia.  Over at Wiki, they host a page of a List of alternate Dungeons and Dragons classes.  It’s actually not 3.5 specific, so it works for any edition.  What’s great about this list is with all the different source books out there, it’s great to have a handy table with all the classes (except the ones from the PHB, which can be found in the Hypertext SRD).  They don’t give anything about the class itself, minus a short description, but they do tell you where you can find the class.  So, (more Sea metaphor) if you know a Bay where a certain group of nautical villains might hang out, they could help you over there.

The last page I have today is questionably legal.  Certainly no more that my thinly veiled Pirate Bay reference earlier.  Crystal Keep hosts PDFs of damn near everything you could ever need from 3.5 D&D.  To the point, even, it’s a bit of a hassle to wade through.  However, even with this inundation of information, Crystal Keep has become part of my bookmarks only because I know if I need to find some super esoteric race or feat, I can find it there.  Like the wiki page, they tell you the source of the information, so you can either go buy the book (like a chump) or be a pirate.

Posted in 3rd, dragons, dungeons, internet, links | Leave a comment

Elements of Greatness: Skill versus Luck

Making a great game is difficult.  If it wasn’t, we’d be flooded with great games and great would become average and we’d have to looking out for amazing games, because we’d be bored with great.  However, there are several factors that make an alright game good, a good game great and a great game amazing.  While I certainly won’t be able to touch on each and every specific factor, most of these bits and pieces each fall into one of several categories.  So, in a piece I’m calling Elements of Greatness, today we go over Skill versus Luck.

Skill versus Luck
This one is a pretty debatable factor, so I figured I’d go over it first.  This one doesn’t really have a right answer.  It’s very dependent on your point of view.  There are people who think a game should be all skill and no luck.  Games like Puerto Rico are good examples of that, where there is very little chance involved.  Some people think luck should be everything and skill should take a backseat.  If you disagree, go down to Las Vegas and see what they think about the idea of luck based games.  However, with any divided opinion, most people fall into the moderates, some leaning toward one side or the other.

What’s kinda funny about this factor of games is how hidden it can be.  Some games are far more luck dependent than they seem.  Munchkin, for example, is a great game.  It is a lot of fun and I really enjoy playing it.  However, as much fun as I have playing Munchkin, it is nearly completely dependent upon luck.  What cards you draw and what monsters you face are all based on random chance.  There’s never really any time in the game where you have to sit and think about your turn.  The benefit of a luck based game is no game will ever really play out the same way.  Sure, the basics are the same, but when each player gets a new hand or depending upon the die rolls, when each game is different, it keeps the game fresh and exciting each time you play.  However, winning and losing a luck based game can be a meager victory at best.  You didn’t really DO anything to win, the dice or cards simply landed in your favor.  On top of that, losing badly during a luck based game feels terrible.  While the other players flourish and cheer as they get what they need, it does not feel good sitting there and waiting while they each collect their rewards.

Puerto Rico is just the opposite.  It’s a game that is almost totally reliant on skill.  There are hardly any times in the game where the players don’t know exactly what will happen next (barring other player choices, of course).  The benefit of this sort of game is when you win, you know it was really because you were the best. No other players can whine and moan about poor rolls or poor draws.  They had the same opportunity as you, you were just better than them.  The downside of this type of game is they have much more potential to become stagnant in replay.  If you have a strategy that works most of the time, you can keep attempting that strategy and it can continue to win until your friends catch up and figure out how to beat it.  Perhaps I’m over simplifying, but the point remains that a game without chance has no random factor and that makes it possible to play the same game over and over.

Like most people, I’m in favor of games that have a touch of both.  Although, honestly, I favor a bit more skill than luck, for the most part.  It’s not difficult to find a game that had both luck and skill, in fact, I’m going to venture a guess that 95% of all games have some elements of both.  So, the matter comes down to finding a good balance between the two.  It’s easy to add skill to a luck based game.  Even something as simple as giving the players a choice of something constitutes as an element of skill.  Rather than having players draw from this deck, they can draw from this deck or that deck.  Rather than have them roll this die, give them the option to roll a standard dice or the dice that has 3 1s and a 5, 6, and 7.  I don’t think that dice exists, but that’d be awesome.  Both dice have the same average, but the latter dice is more of a gamble.  Anyway, Catan is a great example of a game that has touches of both luck and skill.  The luck factor is obvious with the dice rolls each turn and even the random drawing with the robber.  However, the placement of your pieces and deciding where and what to build is a huge portion of the game.  However, ultimately, in Catan, luck has more strength than skill.

So, what’s the point of all this?  In the entirety of this article, I barely said anything about which is the way to go.  Well, that was my point. There is no right answer here.  I was trying to show that different games can rely on skill more than luck or vice versa and still be equally as great.  Whichever you prefer is entirely up to you.  Like any other opinion, you can think however you want and you’re not really right or wrong.  As I said previously, this is only one of many different parts of what make a game great.  I’ll continue to post about the different elements of games and my views on them.

Next time on Elements of Greatness: Customizability

http://rcm.amazon.com/e/cm?t=nerdaphernali-20&o=1&p=8&l=bpl&asins=B00008URUT&fc1=000000&IS2=1&lt1=_blank&m=amazon&lc1=0000FF&bc1=000000&bg1=FFFFFF&f=ifr  http://rcm.amazon.com/e/cm?t=nerdaphernali-20&o=1&p=8&l=bpl&asins=B000W7JWUA&fc1=000000&IS2=1&lt1=_blank&m=amazon&lc1=0000FF&bc1=000000&bg1=FFFFFF&f=ifrhttp://rcm.amazon.com/e/cm?t=nerdaphernali-20&o=1&p=8&l=bpl&asins=1556344732&fc1=000000&IS2=1&lt1=_blank&m=amazon&lc1=0000FF&bc1=000000&bg1=FFFFFF&f=ifr

Posted in catan, Elements, Greatness, Luck, munchkin, puerto, settlers, Skill | 1 Comment